IntelliJ Setup
IntelliJ IDEA is an IDE for developing Java applications. This guide assumes that you have a recent enough version of Java JDK, Ant, and IntelliJ IDEA. Completing Compiling from Source is a requirement for this guide, although experienced developers can skip to whatever step is appropriate.
The following instructions are based on IntelliJ IDEA 2021.2 Community Edition. Instructions for other versions/editions of IntelliJ may be slightly different.
Create a Project
Choice 1: Create a new project
If you already have a working copy of KoLmafia's source code, you can go to choice 2 instead.
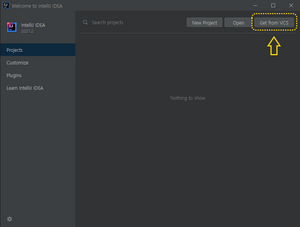
- Start IntelliJ IDEA. In the Welcome to IntelliJ IDEA dialog, click Get from VCS.
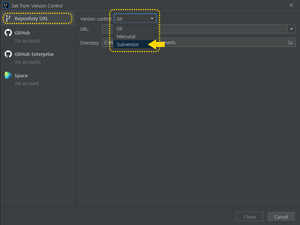
- In the Get from Version Control dialog, select the Repository URL tab.
- In Version control, select Subversion.
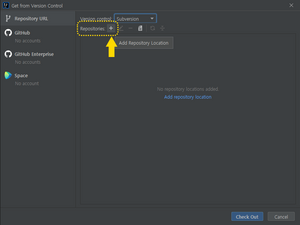
- Add a new repository location. To do so, click the + button next to Repositories.
- In the New Repository Location popup, enter the URL to KoLmafia's Subversion repository. Currently, this is https://svn.code.sf.net/p/kolmafia/code.

- Click OK to close the popup.
- In the New Repository Location popup, enter the URL to KoLmafia's Subversion repository. Currently, this is https://svn.code.sf.net/p/kolmafia/code.
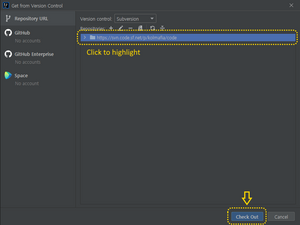
- Once the repository has been added, click the repository URL to highlight it, then click Check Out.
- In Version control, select Subversion.
- If the Destination Directory popup appears, choose a directory to check out the working copy.
Caution: Don't choose a common directory like C:\Users\<username>\Documents. Instead, create a new directory under it (by clicking the folder icon) and give it an appropriate name (e.g. kolmafia).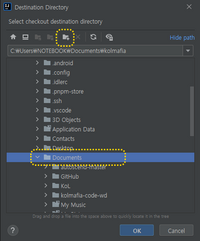
Click OK to continue. - If the SVN Checkout Options popup appears, leave everything as-is and click OK.
- If the Subversion Working Copy Format popup appears, choose the latest version (which is 1.8 format as of writing) and click OK.
- IntelliJ will generate a new project. If it asks you whether to add
kolmafia.imlto Subversion, you may click Cancel to skip it.
Choice 2: Load an existing working copy into IntelliJ
- From the IntelliJ IDEA File Menu, choose New>New Project from Existing Sources...
- Choose the directory with the kolmafia build.xml file and press Open
- Choose Create Project from Existing Sources and press Next
- Enter the name KoLmafia and press Next
- Verify that the project is visible to IDEA and press Finish
Add the Ant Build File
- Open the Ant Toolbar Item (typically on the right side, and not very large)
- Click the + button to add a build file
- Choose build.xml from the file selector and press Open
- Verify that a list of ANT targets appears in the Ant Toolbar
Configure Project
Check Project Settings
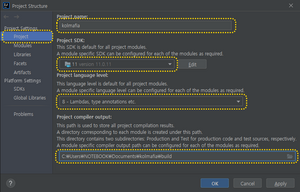
- In the top menu, select File > Project Structure... to launch the Project Structure dialog.
- In the left menu, select Project Settings > Project
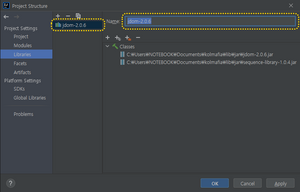
- In the left menu, select Project Settings > Libraries
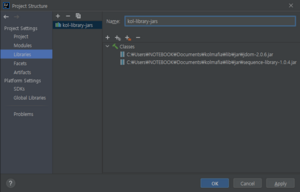
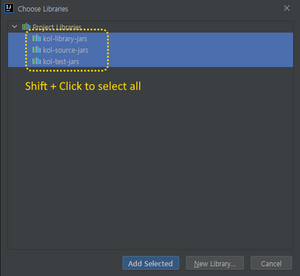
- Add a project library with the name kol-library-jars:
- Click the + button (New Project Library), then select Java to add a new project library
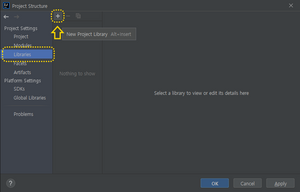
- If the Select Library Files popup appears, navigate to
<project dir>\lib\jardirectory and select all JAR files. You can shift+click the first and last JAR files to select multiple files at once.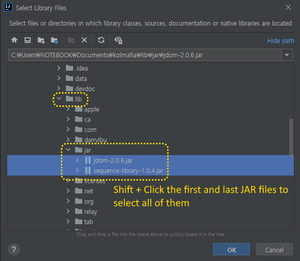
Click OK to close the popup. - If the Choose Modules popup appears, ensure that kolmafia is highlighted, then click OK.

- If you followed the steps above, IntelliJ will create a project library using the name of the first JAR file.
To rename it, select the library, then select the Name field and enter kol-library-jars.
- Click the + button (New Project Library), then select Java to add a new project library
- Repeat the steps above to add a project library with the name kol-source-jars, selecting all JAR files under
<project dir>\src\jar\. - Repeat the steps above to add a project library with the name kol-test-jars, selecting all JAR files under
<project dir>\lib\testjar\. - Click Apply.
- Add a project library with the name kol-library-jars:
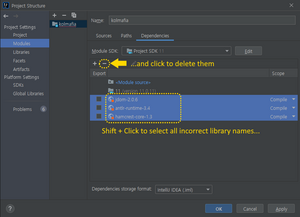
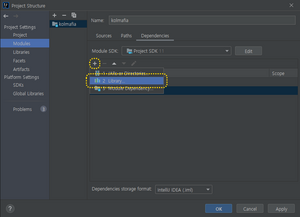
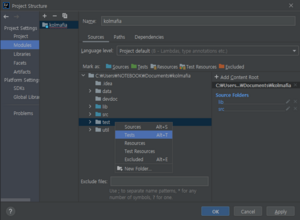
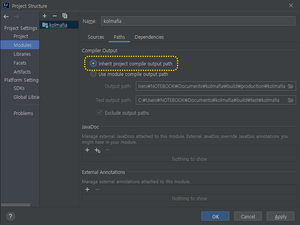
- In the left menu, select Project Settings > Modules
- Select the Dependencies tab
- Select the Sources tab
- Select the Paths tab
- Click OK to close the Project Structure dialog
Add Run/Debug Configuration
- In the top menu, select Run > Edit Configurations... to launch the Run/Debug Configurations dialog.
- Click the + button, then choose Application to add a new configuration
- In the Name Field, enter "KoLmafia"
- Click the icon that looks like a document ("Browse...") to the right of the Main Class field.
- If the Choose Main Class popup appears, wait until IntelliJ populates the list of possible main classes, then choose KoLmafia and click OK
- Add any VM or program arguments needed (typically none)
- Enter the working directory. This is where KoLmafia will store your user data when launched from inside IntelliJ (e.g. C:\Users\<user>\Documents\kolmafia-workdir).
Caution: This should be different from the project directory! - Add the "before launch" tasks:
- Click Modify options at the top right and select Add before launch task
- Add the set.released.false Ant task:
- Click the + button to the right of Before launch, then Run Ant target.
- If the Choose Ant Target to Execute popup appears, select set.released.false and click OK.
- Repeat the steps above to add the set.version Ant task
- Repeat the steps above to add the unset.properties Ant task
- Drag-and-drop the tasks to ensure that each task is executed in the following order:
- Run Ant target 'set.released.false'
- Run Ant target 'set.version'
- Build
- Run Ant target 'unset.properties'
- Click OK to close the Run/Debug Configurations dialog.
Test by pressing the Run arrow next to your config name in the toolbar at the top of the window.
Optional Steps
- Setup SVN to update from IntelliJ (can still be done from the command line or a tool)
- TODO: FIXME...
- To use the Reformat Code feature, download the KoLMafia Style Definitions and import them in the IntelliJ Code Style Preferences.
